Tutorials
How to Install WordPress
Right. You’ve decided to start your own WordPress blog, you’ve found a hosting service that you like, registered a domain name like http://myawesomenewwebsite.co.za, found the BEST theme to dress it up in from eFrog (where else?), and … and … what now?
The answer is, you’ll need to get WordPress installed. Don’t be scared, thanks to the smart folks at WordPress, installation is fairly straight-forward, although the geek-cred you’ll earn by being able to casually mention, “Oh, I installed WordPress and a cool new eFrog theme last night.” is of course, uber-ninja.
Some hosting services have excellent 1-click install options, and if this is the case with the service you signed up with, by all means use that option. Your hosting service will have sent you an email full of servers and logins and passwords and email and FTP stuff. The control panel link, for example, https://cp99.host4africa.co.za, together with the username and password, will all be in that mail. Use your browser to go to the link address, enter your login and you’ll be in the control panel.
There are a few different control panels, but in general, they’ll look something like this:

You’ll find the 1-click install options in the Applications and Services area, under web applications. Clicking here will start a very easy to follow wizard, which will ask questions and walk you through the process quite painlessly.
If you don’t have the option of a 1-click install, or you’d like to do it manually (for that most excellent feeling of accomplishment) read on…
First up, is to create a database on your server, as well as a user who has rights to access and modify the database. That sounds scary, but it’s really not. You’ll most likely be able to do this through the site control panel. What we’re looking for is the Databases icon:

Clicking on the Databases Icon will bring you to the Databases listing for the domain, where you’ll be able to add a new database, and a user for the database. Choose the database and user names carefully, and use a strong password, please. And DO make a note of them; you’ll need them in a moment.

You’re doing great!
Next, you’ll need to download WordPress from WordPress.org. Take the zip download, and once the download is complete, un-zip the archive file. Remember where you’ve upacked the files; you’ll need them in a moment.
Now we need to place the WordPress files on the server, by uploading them using the File Transfer Protocol (FTP). If you are uncertain about this, take a look at George’s very cool FTP tutorial.
You have a choice to upload the files directly to the root of your domain, in the /httpdocs folder or a sub directory (eg. /httpdocs/blog). This will change the link you will type in the browser to get to your site, http://myawesomenewwebsite.co.za vs http://myawesomenewwebsite.co.za/blog
Now we’re into the final stretch. The database has been created, the WordPress files have been uploaded to the site. Now you’ll need to open a browser and type in the address of your website. For example, http://www.myawesomenewsite.co.za. If everything is good, you’ll see a message like this:
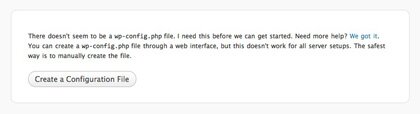
Click the button to create a configuration file and WordPress will respond with a dialog for you to supply the database details, for the database we cleverly created earlier:
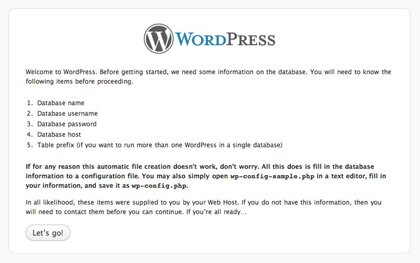
Clicking the “Let’s Go” button brings up the dialog where you actually have to enter the database details. This is what it looks like with our details entered:

Good example of a strong password…
WordPress understands that it has come across an uber-ninja, and meekly responds with:

Run the install!
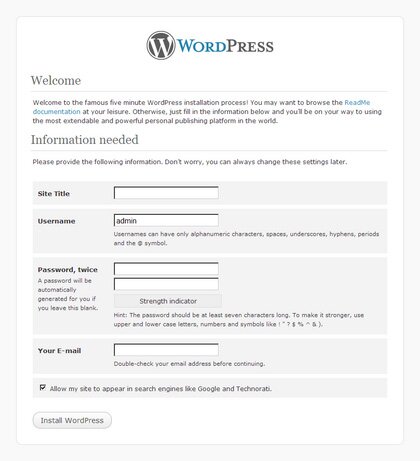
Enter your site title, choose a user name, a strong password and your e-mail address. You can also opt into having your blog to appear in search engines like Google and Technorati. Finally click the “Install WordPress” button. A couple of seconds later, you’ll see this message:
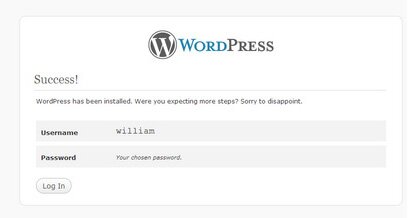
Congratulations! That’s it, WordPress is now installed. Go forth and blog, frog!

